Saturday, October 29, 2011

Mini Vanilla Cake Doughnuts with Chocolate Glaze


I hope everyone is having a wonderful weekend getting ready for all of the Halloween festivities just around the corner! Today was such a fun day, we made some fun Halloween themed treats with the kids, and the favorites were these mini donuts.


The recipe is a Tessa Kiros recipe, just perfect for I Heart Cooking Clubs theme of the week, Harvest Moon -- Foods celebrating Fall's bounty/Halloween-themed foods. The recipe is for Vanilla Cake and I made the cake batter and used it in my mini donut maker, Maxim Donut Bites, pictured below...


This is an almost retro, almost vintage, okay, okay, just old, small kitchen appliance from 1995. It is still going strong. I hadn't used it in years but after seeing all of these cute new mini donut makers all over amazon and at stores I had the yearning to trudge mine out and see if it still fired up. The kids were very excitecd, and I'm sure we'll be using this thing a lot more now that they know about it.


I also broke out my new heart doughnut pans and baked a few heart doughnuts as well, but mostly the minis. I know, hearts are for Valentine's Day, but I love hearts all the time, and we heart Halloween :) The heart ones were gobbled up too quickly to photograph.


Here is the recipe from the book Apples for Jam adapted for doughnuts:

Vanilla Cake Dougunuts

1/2 pound plus 2 tablespoons butter (2 and 1/4 sticks)
1 cup plus 1 tablespoon superfine sugar -- I used regular sugar
3 eggs
1 teaspoon vanilla -- I upped this to two teaspoons
2 and 1/4 cup all purpose flour
1 and 1/2 teaspoons baking powder
3/4 cup half and half

Preheat oven to 350 or preheat your doughnut maker.

Beat butter and sugar together very well in a large bowl. Add the eggs one at a time, beating well after each one goes in. Add the vanilla and sift in the flour and baking powder. Beat well, adding the half and half a little at a time. You will have a thick and creamy batter.

Scoop it into a ziplock bag and cut small hole at the end, squirt in enough batter to fill your doughnut molds half full and bake in the oven for about 10 minutes, depending on your pan, or about 2 minutes in your doughnut maker (or follow manufacturers directions for baking) remove to wire rack and cool completely before frosting or glazing.

~~~

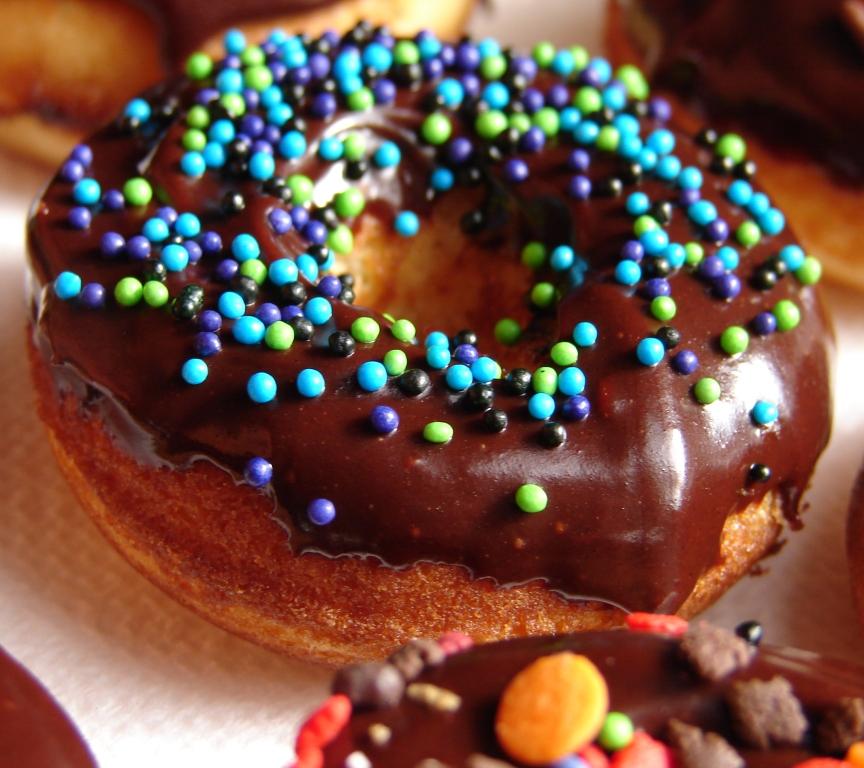
To top the doughnuts I made a quick chocolate glaze, I didn't measure really, but it was pretty much 1 and 1/2 cups semi sweet chocolate chips, 1/4 cup corn syrup, and 1/4 cup half and half, microwaved together for 2-3 minutes and half power, stirring vigorously after every 30 seconds. Add a little time as needed and add some extra light corn syrup if it is too thick. It should be shiny and glossy and easy to dunk the doughnut tops in -- you could also spread it on the doughnuts, just make sure to add any desired sprinkles asap so they will stick.


These ended up being the perfect snack and a perfect fun halloween treat to make with my kids and their neighborhood friend. I wish I had snapped some pictures, but it was kind of crazy managing kids and sprinkles and chocolate glaze :) Happy almost Halloween!


Tuesday, October 25, 2011

Mini Fig Cakes for Fall and Ginger Jazzed Brownies


Another Tuesdays with Dorie twofer here, just can't seem to get them up on time! This week our recipe pick was A Fig Cake For Fall, picked for us to try by Ursula of Cookie Rookie, thank you Ursula! I looked and looked for fresh figs but could not find any, so I used dried figs instead. I also switched out the lemon for an orange and made a half batch of mini cakes instead of one big one.


Here are the cakes before baking, I only had enough batter to fill five jumbo "Baker's Secret Texas sized" muffin cups.


Here are the dried figs simmering in the orange scented honey wine sauce, yum!


Here is what they looked like after baking and dusted with some powdered sugar, sadly, I let my wine sauce simmer too long and it turned into more of a thick caramel, and not in a good way, so I couldn't use it on my cakes, but the little taste I had was delicious!


I topped them with whipped cream and they were absolutely delicious, although different from their intended version, they were enjoyed. You can see that the dried figs sank to the bottom, but that was fine...


Now on to last week's recipe, Ginger Jazzed Brownies, picked for us to try by Clivia of Bubie’s Little Baker...


While I was buying fresh ginger, I saw this little jar of chopped ginger and had to give it a try. I love ginger but hate chopping it and thought the finely minced texture (almost a paste) would work perfectly in these brownies, since last time we made the chocolate gingerbread with TWD the ginger chunks were a little too overpowering for my clan. I ended up loving this jarred ginger and immediately went to amazon to see if I could order it in bulk, sadly, to no avail -- come on Christopher Ranch, sell on ammy!


The jarred ginger worked perfectly and I personally loved these brownies, they were so delicious! My kids and the neighbor kid loved them too, I heard they were "awesome!" -- which always makes a baking mommy smile. Picky husband on the other hand, poor guy was excited to try these, and I failed to mention they were ginger brownies, he took one bite and said "yuck!" and thought they were gross. Sorry, honey, I will make you regular brownies soon :)

Wednesday, October 19, 2011

Rigatoni with Tomato, Eggplant, and Ricotta


This delicious dish was my pick for I Heart Cooking Clubs theme of the week: Peasant Food.  Pasta is so inexpensive and easy to store in the pantry that it is always on hand at my house. Sometimes I go a little crazy buying fun shapes or fancy imported pastas, but for this dish I used good ole rigatoni that you can find at any supermarket; and, just maybe, right in your own pantry :)  


The kicker that really makes this dish "peasant food" is that the eggplant was free since it was from my garden!! Now, take the word garden lightly here, this was actually my first year planting any vegetables, and I just had a few plants in a small area next to my back porch.  The kids were excited to plant the vegetable plants and loved harvesting our teeny tiny crop.  Our very first garden consisted of one zucchini plant, one summer squash plant, two eggplant plants (only one of which produced), one acorn squash plant, and one jalapeno pepper plant -- that only produced one unedible gnarly little pepper.  Anyway, it was a fun experience, along with our first herb garden which we also planted this year, and we will probably try gardening again next spring.  On to the recipe...

Penne Rigatoni with Tomato, Eggplant, and Ricotta
Tessa Kiros -- Apples for Jam

1 small eggplant
salt and freshly ground pepper
5 tbsp olive oil
1 large garlic clove, peeled and squashed a bit
1- 14 ounce can tomatoes
3/4 of 1 - 16 ounce package of penne (I used rigatoni)
1/4 cup salted mature ricotta or finely grated parmesan cheese (I used 1/2 cup of regular ricotta, I can never find the hard ricotta, ricotta salata I believe it is called, and this is peasant food, right? so I used what was on hand even though it changed the recipe a little)
3 tbsp chopped fresh parsley (thank you, herb garden!)


Cut the eggplant into slices about 1/4 inch thick and about 1 inch across. Toss them into a colander, sprinkle with a teaspoon of salt, and leave them for about 40 minutes to drain off any bitter juices.

Heat half the olive oil with the garlic clove in a smallish pan over medium low heat until you can just smell the garlic. Add the tomatoes and season with some salt and pepper. When it comes to a boil, lower the heat and simmer uncovered for 15 to 20 minutes, until it all melts into a sauce. Break up any bits of tomato with a wooden spoon as you stir. Keep warm.


Rinse and drain the eggplant pieces and pat them dry with paper towels. Heat the remaining oil in a nonstick frying pan (I used my electric wok) and saute the eggplant over medium heat until it is crusty and golden in places on the outside but still soft inside.


Meanwhile, cook the pasta in a large pan of boiling salted water, following the package instructions. Drain, keeping a cup full of the water.


Put the paste in a large serving bowl. Add the eggplant, the tomato sauce, cheese, and parsley and mix together thoroughly, adding some of the pasta cooking water in the pasta seems dry. Serve immediately.  Serves 4.


I made this for lunch one day when my four year old and picky husband were home. I absolutely loved it, I think it is a wonderful recipe and would make it again for sure, and use extra eggplant since that was my favorite part.  The eggplant was amazing, I don't know if it was because it was homegrown or the preparation but this was the tastiest eggplant ever, and I adore eggplant! My four year old liked this but didn't love it.  I was very surprised picky husband was even game for trying this one, he hates most pasta but I think he was trying to be nice, anyway, he is not an eggplant fan, but said that this was the best eggplant.  He did not like the pasta...oh-well.  If you like pasta and eggplant, this is a winner recipe for sure :)

I'm sending this along to  HoneyB at The Life and Loves of Grumpy's Honeybunch for Presto Pasta Nights #236, thank you for hosting, HoneyB!

Saturday, October 15, 2011

Mini Sawdust Pies


Time for another Club: BAKED treat! This one is called Sawdust Pie, and according to Baked Explorations it was created in the late 1970s, at Patti's 1880 Settlement Restaurant (I googled Patti's and found out it is still around and going strong, and on the current dessert menu, there it was, Sawdust Pie) despite it's old timey name suggesting it is from much earlier.  It became popular after being published in a Bon Appetit magazine in the 1980s and has seemingly since fallen off the culinary map. I personally had never heard of Sawdust Pie, and was excited to give it a go.  


Since picky husband does not like pecans or coconut, both of which are in this recipe, and the kids are kind of hit or miss with new recipes I decided to halve this recipe and use my mini square tartlet pan.  The hardest part of the recipe was fitting the pie dough into the squares, which wasn't even that hard, just a bit tedious, but worth it for these cute little Sawdust Pies all the way.


I was surprised at how little liquid goes into this recipe, only egg whites and a touch of vanilla are mixed into the dry ingredients.  Scoop the mixture into your prepared pie dish of choice and you are ready to bake.


Above is before baking and below is after. The filling rose quite a bit so I am glad I didn't over fill the crusts!


The pie is supposed to be served with whipped cream and bananas, we were out of bananas, but served with whipped cream, these little pies were absolutely delicious!  I could definitely see making these again or even the whole pie as a holiday pie, especially if you are serving this to a pecan and or coconut fan :)


A big thank you to Tessa at Cookin' Chemist for picking this recipe for us to try, you can find the recipe here at her site  if you do not have the book Baked Explorations, give this retro recipe a try for sure :)  

Tuesday, October 11, 2011

Basic Biscuits & Apple Nut Muffin Cake


Time for a Tuesdays with Dorie twofer! I didn't get to last week's recipe on time, but late is better than never, right? I made the Apple Nut Muffin Cake with an apple fresh from the orchard and it was delicious!

my three sweeties at the apple orchard

All three kiddos loved the cake, which I cut into squares for a quick breakfast snack.  I followed the recipe almost exactly, my only change was to use a 9 by 13 pan since I couldn't locate my 8 by 8 one, so my muffin cake squares are a little thinner than they should be, but that just made them easier to munch :)   Thank you to Katrina at Baking and Boys for this TWD pick, you can find the recipe for Apple Nut Muffin Cake here at Katrina's site if you do not have Baking From My Home To Yours.


I made today's TWD pick, Basic Biscuits, yesterday when my kids got home from school.  They were wonderful, were the the best biscuits I've ever made or had? Could have been, yeah, they were that good!  I mixed the ingredients in the food processor (a tip I've learned from Baking From My Home To Yours) to ease up preparation (not that it was that difficult in the first place.  I also always just cut my biscuits one time, unless I'm going for specially shaped (i.e. heart) biscuits.  It is quick and easy, gives them a rustic almost square shape, and no scraps to re-roll :)


Above is before baking, below is after. I baked on an insulated baking sheet lined with foil and sprayed with cooking spray.  I baked for 14 minutes just like the book said, although I usually take my biscuits out a touch sooner, these were just perfect. 


Look at how light and fluffy and "top hat high" these got, love that part of Dorie's description in the recipe!


All in all, two perfectly delicious TWD treats in a row!  A huge thank you to Jennifer at Cooking for Comfort for this recipe pick -- you can find Dorie's recipe for Basic Biscuits here at Jennifer's site, this one is a keeper :)  I'll leave with an extra shot of the Apple Nut Muffin Cake, a side view so you can see all the goodies (apples, raisins, walnuts) baked in...yum!

Monday, October 10, 2011

Whole Wheat Pluot and Apple Pie


I recently made Whole Wheat Apple Pluot Pie, just perfect for I Heart Cooking Clubs theme of the week: Orchard Fruit. Picky husband and I took our three little monkeys to the u-pick apple orchard last weekend and had an amazing time. Just look at that gorgeous view of the orchard and my little sweeties...too fun :)


So while the apples in this recipe are fresh from the orchard, the pluots are from Sam's Club...wish we could have gone all local but the kids are in love with the pluots and we just have to buy them every week now.


Whole Wheat Apricot Pluot and Apple Pie
Tessa Kiros -- Apples for Jam

Pastry:
1 and 1/3 cups whole wheat flour
1/3 cup firmly pack light brown sugar
7 tbsp chilled butter, cubed
1 egg, plus 1 egg yolk
a few drops of vanilla extract
I had to add about 1/4 cup water to help the crust stick together but probably could have added a touch less

About 3 Apples -- I used 4 smaller ones
3 tbsp butter
2 tbsp light brown sugar
1 tbsp water
1 tsp cinnamon
about 10 fresh apricots, halved, or quartered if large, pits removed -- I used about 7 pluots
about 3 tbsp superfine sugar -- I just used regular sugar


To make the pastry, put the flour, sugar, and butter in a bowl. Work it all together with your fingers until you have a sandy mixture. Add the egg, extra egg yolk, and vanilla, and carry on mixing until you have a smooth ball. Wrap it up in plastic wrap, flatten, and put in the fridge for about 30 minutes. I mixed up the pastry in my food processor.

Meanwhile, peel and core the apples, and cut them into chunks. Put half of the butter in a nonstick pan and add the apple chunks, the brown sugar, and a tbsp of water. Put the lid on and cook over medium heat for about 15 to 20 minutes, until the apples collapse and turn slightly golden on the bottom. Stir in the cinnamon and squash the apples into a puree with a wooden spoon. Remove from heat.

Preheat oven to 400. Roll out the pastry on a sheet of parchment paper to a circle of about 12 to 13 inches, dusting with a little flour if necessary. Using the parchment paper, flip the pastry oven into an ungreased 9 and 1/2 inch springform pan. I used my heart shaped springform and plastic wrap.


Let it settle in before peeling off the paper and pressing the pastry onto the bottom and sides of the pan. Don't worry if the pastry tears, just patch it and press the gaps together.


Spread the apple over the bottom and put the apricots pluots on top. Scatter with superfine sugar, more or less, depending on the sweetness of your fruit.


Dot with the rest of the butter, then fold the pastry edge in and over to cover the edge of the filling. Bake for about 40 minutes, or until the top of the fruit is golden brown in places, and the pastry crisps. Serve plain or with yogurt and whipped cream. Serves 6 to 8.


~~~
This was an absolutely delicious fall fruit recipe. All three of my kids really loved this one! Picky husband gave it a try but didn't finish his piece, he is not a big stone fruit fan. I thought it was wonderful and would make it again for sure. It wasn't really sweet, but it was sweet enough to really enjoy the fruit flavors. It would be great for a brunch. I'm sure I'll be making this one again since it was such a huge hit with the kids -- I loved it too :)

Thursday, October 6, 2011

Tomato Lasagna


This is my dish for the I Heart Cooking Clubs October Potluck.  Who doesn't love a lasagna at a potluck?  This is a basic lasagna with a tomato sauce and bechamel sauce sandwiched between layers of noodles, simple and delicious.   I made this for our unofficial monthly lasagna night, usually a weekend day when there is nothing planned, and I have plenty of time to make picky husband's favorite meat lasagna and a vegetarian friendly lasagna. The kids get to pick whichever lasagna they want, and we always have enough leftovers for a few quick lunches during the busy week.

This is the second Tessa Kiros recipe I've try (thank you, IHCC) and another good one! Here is what Tessa has to say about her Tomato Lasagne in the book Apples for Jam...

"This is a straightforward recipe to which you can add a few blobs of goat's cheese, some dollops of pesto, a little cooked spinach, or broiled long slices of zucchini between the layers.  This is just lasagne noodles, a good tomato sauce, and bechamel, and my children love it..."    I love all of Tessa's suggestions for add-ins and was planning to use a special limited batch goat's cheese I have in the cheese drawer, but I completely forgot to add it in while making this, so this is the plain and simple version...


Tomato Lasagne
Tessa Kiros -- Apples for Jam

Tomato Sauce:
1/2 cup olive oil
3 cloves garlic, peeled but left whole
salt
3 (14-ounce) cans diced tomatoes -- I used two cans of whole San Marzanos and one can of regular diced tomatoes
About 12 basil leaves, torn
1 cup hot water -- I only used about 1/2 cup

Bechamel Sauce:
1/4 lb butter
2/3 cup all purpose flour
4 cups milk, warmed -- I used skim
Salt and freshly ground black pepper
Freshly grated nutmeg -- I used ground, about 1/4 teaspoon

3/4 (16 ounce) package lasagne noodles
1 cup grated parmesan cheese

For the tomato sauce, heat the oil and garlic in a large pan. When you begin to smell the garlic, add the tomatoes and a good pinch of salt and bring to a boil. Lower the heat and cook uncovered for about 20 to 25 minutes, until it has all merged into a sauce. Add the basil and 1 cup of hot water toward the end of the cooking time. Puree until smooth, minus the garlic if you'd prefer.  (I didn't puree, just mashed with a potato masher, garlic and all)

To make the bechamel, melt the butter in a small (I'd say medium) saucepan over lower heat. Whisk in the flour and cook for a few minutes, stirring constantly, then begin adding the warm milk.  It will be immediately absorbed, so work quickly, whisking with one hand while adding ladlefuls of milk with the other. When the sauce seems to be smooth and not too stiff, add salt, pepper, and a grating of nutmeg and continue cooking, even after it comes to a boil, for five minutes or so, mixing all the time. It should be a very thick and smooth sauce. 

Preheat the oven to 350 and grease a deep 8 1/2 by 12 inch baking dish. Drizzle some bechamel over the bottom of the dish to cover it very thinly. Put a slightly overlapping layer of lasagne noodles on top. Dollop a thin layer of tomato sauce over that, spreading it with the back of the ladle. Add about two ladlefuls of bechamel in long drizzles, and the cover with a sprinkling of parmesan. Add another layer of lasagne noodles, then tomato, bechamel, and parmesan as before, and then repeat the layers one more time.  I just repeated until I was at the top of my baking dish and out of bechamel, I did have about 1 1/2 cups tomato sauce left. You should have about 4 tablespoons of tomato sauce and a good amount of bechamel left. Make a final layer of lasagna noodles and cover with all the remaining bechamel. Dollop the tomato sauce here and there and sprinkle with and remaining parmesan. 


Bake for about 30 minutes, or until it is bubbling and golden on top.  Serves 6 to 8.


~~~

This was a delicious dinner.  The bechamel was so rich and creamy, one small serving of this lasagna was very filling.  My two oldest wanted meat lasagna, so only my youngest, who is four, and I ate this one but we both liked it.  I wouldn't hesitate to make it again, and definitely think Tessa's add-in suggestions would be fabulous.  The leftovers were great reheated in the microwave, and I think that it tasted even better the second day :)


I'm sending this along to Ruth at Once Upon A Feast for Presto Pasta Nights #234 -- thanks, Ruth!

Saturday, October 1, 2011

Thai Curry Noodles with Tofu


September's cooking destination at My Kitchen My World was Thailand and I made these Thai Curry Noodles with Tofu.  I had a ton of different Thai recipes bookmarked and the Thai noodle dishes were especially calling to me.  When my husband and were newly married we lived in Texas and there was this little hole in the wall Thai place that I absolutely loved.  I really miss their Pad Thai!   

I found this recipe here at about.com's Thai recipe area. This was my first time making a curry seasoning without using "curry powder" in a jar.  I know. Everyone makes their own curry seasoning, but for me, the different varieties of jarred curry powder always seemed to add just the right amount of flavor for me.  Now that I've dipped my toe into making my own spice blend, I'm sure I'll be experimenting with different curry mixes quite often, even if I'm the only one who really likes curry in our household.  Luckily for me curry makes great leftovers and the flavors deepen over time.

Thai Curried Noodles with Tofu
"This curry noodles recipe is a condensed version of an ancient Thai noodle dish called "Kao Soy". Since it would take an hour or more to make the original recipe, I've simplified it somewhat while still maintaining that delicious original taste. You can use dried egg or wheat noodles for this dish - or splurge and pick up some fresh noodles at your local Asian food store or grocery store deli. A delicious curry noodle recipe you'll be sure to enjoy." -- from about.com

•dried or fresh egg or wheat noodles - enough for 2-4 people
•1/2 package medium-firm tofu, cut into cubes
•1 red bell pepper
•1 green bell pepper (I used two smaller green peppers)
•handful of fresh shiitake mushrooms (I used regular white mushrooms)
•1/2 cup coconut milk (I started with 1/2 but ended up using 3/4 cup)
•1 lime, cut into wedges (I bought a lime just for this, but forgot to add it!)
•3 Tbsp. soy sauce
•oil for stir-frying


Curry Paste
•1/2 tsp. turmeric
•3 cloves garlic
•1-2 fresh red chilies (de-seeded if you prefer less spice) (I used 1 dried Japanese chili)
•1 thumb-size piece galangal or fresh ginger (I used ginger)
•1 Tbsp. ground coriander
•1 tsp. cumin
•1/2 tsp. ground cardamon
•1/4 tsp. ground cloves
•1/4 tsp. cinnamon
•2 Tbsp. fish sauce or vegetarian fish sauce (available at Vietnamese stores), OR 2+1/2 Tbsp. soy sauce
•Optional: sugar to taste (I added 1 tbsp brown sugar)

Cook noodles according to instructions on package. If boiling dried noodles, be sure to rinse well after cooking with cold water to keep them from sticking together. Tip: The noodles will be stir-fried later, so try not to over-cook at this point. Set aside.


To make the curry paste, place all paste ingredients in a food processor or chopper. Process well. Or, mince ingredients well and pound together with a pestle & mortar.


Heat a wok or large frying pan over medium-high heat. Add 1-2 Tbsp. oil and swirl around, then add the paste. Stir-fry briefly to release the fragrance (30 seconds to 1 minute).


Add a few Tbsp. of the coconut milk and stir into the paste, then add the vegetables.Stir-fry 2-3 minutes, or until mushrooms are cooked and bell peppers are bright in color. Tip: Add a little more of the 1/2 cup coconut milk if your wok/pan becomes too dry.

Add the remaining coconut milk plus the soy sauce. Stir-fry everything together, then add the noodles and tofu. Tip: If your tofu is soft and will fall apart, add it just before serving, gently folding it into the noodles. Using 2 utensils, gently stir-fry the noodles, lifting and turning them as you do so. Stir-fry in this way until noodles absorb most of the coconut-curry sauce (1-2 minutes).


Taste-test the noodles, adding more fish or soy sauce if not salty enough, and a little sugar if too sour. If your noodles happen to be too salty for your taste, add 1-2 Tbsp. lime juice.


Serve noodles hot from the wok. 
 

These were so tasty, I would make them again for sure. The only thing I would change is to probably fry up the tofu in a little oil first to make is crispier, other than that, perfect curry noodles :)
Related Posts with Thumbnails